Going with WordPress
I’m going with WordPress. It’s under active development and I’ve found some anti-spam plugins and the like. You’ll see my new blog shortly.
The coldest winter I ever spent
I’m going with WordPress. It’s under active development and I’ve found some anti-spam plugins and the like. You’ll see my new blog shortly.
I’m not going to put my blog on some “free” advertiser supported site where you have to click-sign away rights to your own material, that’s put into a database that I don’t have access to, on a server of unknown reliability.
But then…
You might think I’m overreacting when I talk about not using a particular system because of comment spam problems. But I’ve seen WAY too many blog posts like the following “i never write here anymore. i’ve had it up to here, there and okay there with pr0n comment spam.” That comes from a b2evolution user.
Just do a google search for wordpress “comment spam” or b2evolution “comment spam”. It’s a huge problem.
My current system still keeps chugging away…. a flat file index.html file that I hand edit with Frontpage. CSS makes it look good.
Here’s a nice analysis from Kas Log (I would have put this behind a ‘cut’ but I don’t have a very sophisticated blogging system ;-)
Open Source weblogging tools
This weblog is powered by WordPress, and aside from saying thanks to the WordPress team for building a great Open Source weblogging tool, I thought it might be useful to share my reasons for choosing this package over several others.
Before I started looking at any specific tools, I came up with the following list of requirements:
- Must run comfortably on accounts hosted at
- FatCow. This weblog isn’t hosted there, but nabeepchen.com which I set up at the same time is. Also, my corporate site (felinity.com) is hosted at Fatcow, and I might want to add a blog to that later. [Note: I’m a Fatcow affiliate. If you sign up for a web site with them by clicking on the Fatcow link above, I get some moolah.]
- Must have a browser based interface that is easy to use, but powerful enough for first class blogs. The interface should be lean and efficient, although a little eye candy never hurts.
- Must have integrated comments, pings, and trackback.
- Must provide comment moderation.
- Must be actively maintained.
- Must support RSS feeds.
- Must update pages automatically [added after trying Greymatter].
- Must allow multiple categories per post [added after trying Nucleus].
- Look and feel of weblog must be completely customizable.
- Should have automatic comment spam filtering.
- Should support Atom feeds.
- Preferably Open Source.
- Compatibility with desktop weblogging front-ends would be nice.
- The fewer external dependencies (plug-ins, libraries, etc.), the better.
Fatcow runs MySQL 3.23.x, and Apache 1.3.x with PHP 4.x and Perl, on Sun Solaris servers. Unfortunately, neither Python nor PostgreSQL are supported, which limits my options a bit. After a quick look at the system requirements for various packages, I narrowed my list of potentials down to four programs: Blosxom 2.0, Greymatter 1.3, Nucleus 3.1, and WordPress 1.2. On the commercial side, I knew that Movable Type would fit the bill, if none of the Open Source alternatives came close enough.
WordPress came out on top and meets all of my requirements, including the optional ones. Not considering price, I think it even beats Movable Type. Read on, for my impressions of each package, but note that I spent only two or three hours with each of them, except of course WordPress. Just keep in mind that there is probably a lot of stuff I missed, and newer versions may shift the overall picture considerably.
Each of the packages is relatively easy to install, if you know your way around a Unix system. Blosxom and Greymatter store everything in plain text files, and are written in Perl. Nucleus and WordPress require a MySQL database, and are written in PHP 4.
I quickly crossed Blosxom and Greymatter off my list, because neither had the must have features. Nucleus and WordPress were a much better match, and it took me a bit more time to decide between the two.
Blosxom is great for people who live their lives in the Unix shell. You just create a simple text file, and voilà, the blog entry is on-line. Categories are the directories underneath the main data directory. This approach makes it exceptionally simple to automatically post stuff from scripts and whatnot. Unfortunately Bosxom has no real web based interface. The plug-in for that is experimental and bare bones to the extreme. I was also a little concerned about performance for large sites, because each request might require searching through multiple directories and files, although the caching plug-ins that are available might address those concerns. Blosxom itself is just a single Perl CGI script with a few hundred lines of code, and installation is trivial. However, to get the functionality I want, I would also have had to separately install and configure a number of plug-ins, and while that might give me the functionality I need, it also means a lot of tweaking and fiddling, and extra work to keep everything up-to-date. What I did like and have not seen in other packages is the simple, but effective URL hacking scheme Blosxom offers. Basically, you can just concatenate categories and dates with slashes, to drill down by category or date. I am using the same approach for some internal tools, and I was pleasantly surprised to see the same idea implemented here. The bottom line: Blosxom is too complicated for casual users, and it didn’t have the features I was looking for.
Greymatter came a bit closer to what I had in mind. It did have a web based interface, built-in comments, and like Blosxom, the blog entries are stored in plain text files. One thing I learned from playing with Greymatter was, that I didn’t want a program that requires me to rebuild my pages manually. It wasn’t on my original list of must have features, but I added it as a requirement. Aside from two step updates, Greymatter didn’t support comment moderation, pings, trackbacks etc. On a more subjective level, I didn’t like the look and feel of the interface.
Nucleus made a strong impression immediately, with a clean and well designed interface. Setup was trivial, and I liked the little pop-up window for uploading images, and choosing existing files from a list. Surprisingly, adding a blog style calendar is only available via a plug-in. Out of the box, Nucleus allows comment deletion and IP banning, but comment moderation, pings, and trackback require plug-ins. One requirement I added to my must have list, after using Nucleus, was the ability to put posts into multiple categories; Nucleus supports only one category per item. The biggest drawback from my point of view was Nucleus’ template system. If your site design fits neatly into the Nucleus framework of templates and skins, then customization is easy enough. But if you expect to go beyond basic blogging functionality you might find it quite limiting. One feature Nucleus offers that I didn’t need, but that could make all the difference to some people, was the ability to handle multiple blogs.
WordPress was the last program on my list of candidates. Installation was trivial, and although I might prefer the Nucleus look slightly, the WordPress interface is pleasant enough and functional. Most importantly, WordPress had all of the features I was looking for right out of the box; no plug-ins needed. The main template is simply a PHP script with a style sheet. You can change the look of WordPress sites quite dramatically by just dropping in a new style sheets, but even editing the content and layout is easy enough, if you know HTML and just a tiny bit of PHP. Multiple and even hierarchical categories are supported, as are pings, trackback, and the various feed formats. After using Nucleus, the image upload feature seemed a bit bare bones, but it works and a plug-in might improve things. Where WordPress stood out was in comment handling. You can configure the program to queue comments for moderation if they contain common spam words, come from certain IP addresses, or contain a certain number of links. If there’s one complaint, it’s that the documentation is a bit sparse and scattered, but it was sufficient to get everything set up the way I wanted it. The WordPress forums are very active and helpful; all my questions had already been asked and answered.. Make sure to check out the WordPress Wiki. I overlooked that at first, and it seems much more complete than the reference documentation on the main page. All in all, given my requirements, WordPress was the clear winner.
I tried out PMachine.com blogging software tonight. Last week I had tried WordPress. There were a few key reasons I didn’t want to use it; the one that stands out most notably is that there was no solid way to keep comment spam at bay. So I ran PMachine through it’s paces and liked it. Then I realized that there is no facility to import old entries (like this one) into Pmachine or Expression Engine. That erked me a bit, knowing that my old entries would sit outside the new system. Then I realized that there would be no way to EXPORT my blog out of PMachine if I ever decided to switch. Damn lack of standards. This blog is currently maintained by hand… and I’m thinking it will continue that way. :-(
I’ll never be this good at anything: Mr. Woo bouncing a soccer ball off every part of his body for almost seven minutes without a single miss.
2-19-10 Update: I originally found this on EBaum’s World but it’s been moved. I refound it on Youtube.
local version:
Firefox 1.0 Tweaks
Lots of tweaks at http://windowssecrets.com/041202/
Fixing a memory leak-ish issue in Firefox 1.0
Firefox tends to use more memory than maybe it should. Here’s how to fix the issue. From forums.mozillazine.org
Type about:config into the location bar, press enter, right click any line, choose “new”>”integer”, paste this into the dialogue that appears:
“browser.cache.memory.capacity”. Click OK, specify the amount in kb in the next dialogue that appears, restart firefox.
Yes, it seems to help performance.
Windows XP Tweak: Prefetch
Windows automatically preloads programs it thinks you use a lot. But many programs shove their way into this folder, sucking up your RAM. Once every couple months or so do the following:
del c:\Windows\Prefetch
Your computer will boot faster and use less RAM. The worst that can happen is some programs will load slower the first time you start them after doing the fix.
Credits: tweakxp.com, techrepublic.com.com
Make Firefox Prefetch
I use Firefox all the time, so I do this:
You can speed up the loading of Firefox on Windows XP by adding it to the programs that XP “prefetches.”
To do this, right-click the Start Menu item for Firefox, or any icon you use to start Firefox, and open the Properties dialog box. Add a space plus /Prefetch:1 to the command line and click OK. The resulting line might look as follows:
“C:\Program Files\Mozilla Firefox\firefox.exe” /Prefetch:1
A detailed explanation of XP’s prefetch feature is provided by TechRepublic.
Windows XP Tweak: Defrag
An oldie but a goodie. Run:
defrag c:
Every couple months
I’ve been playing Half Life 2 for a couple weeks now. Maybe I have 15 hrs of play time into the game and 5 hours into Counterstrike. I love marveling at the countryside I’m riding through, knowing that although my character can walk through it and manipulate it to a great extent, it is a completely fictitious universe. That’s cool. Remember what I was saying about special effects winning me over in The Matrix? Well I just got to see “Dog”, this robot in Half Life. Wowie Zowie, I marvel at it.. and doubly so knowing that it doesn’t even exist!
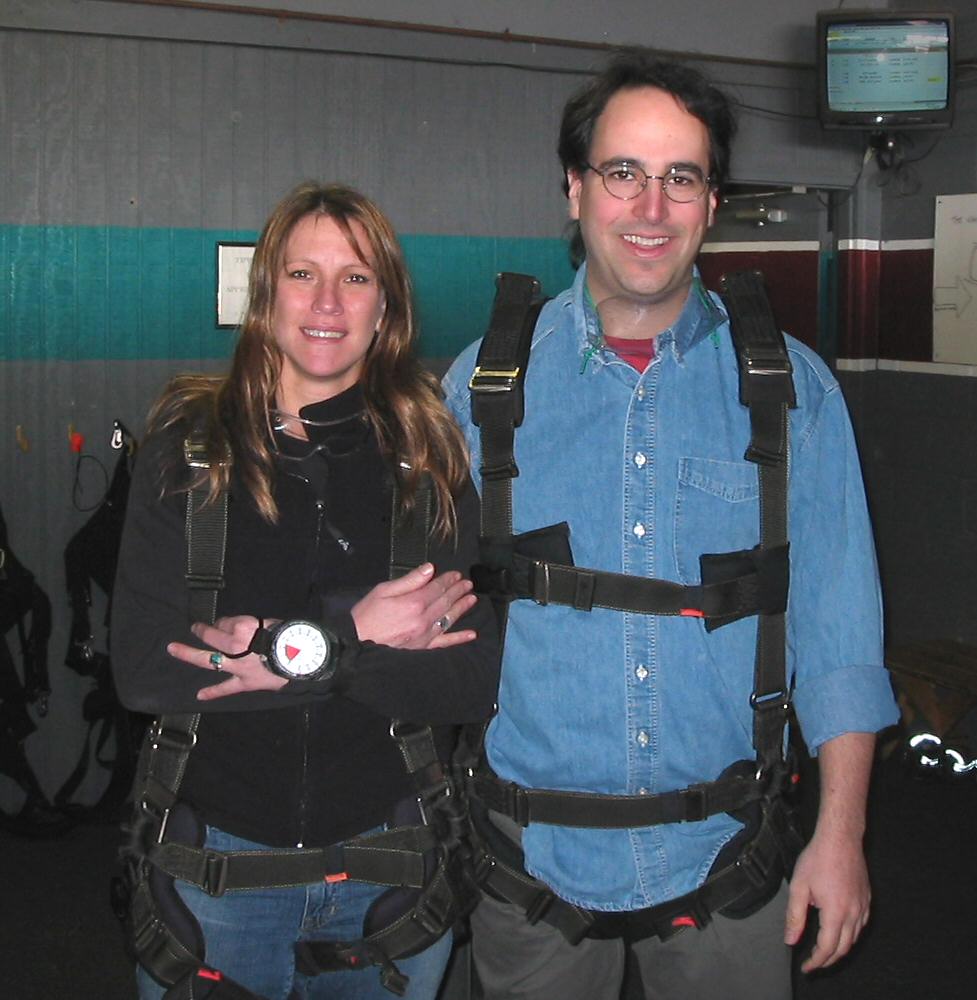
VC and I went skydiving on new year’s day. What a way to start it all off! It was fantastic!
I saw Matrix Reloaded with Tara and Ross last year. My comments back then were that there really was only one movie, just stretched out into 4 hours. After seeing the first 30 minutes of Revolutions, I am reminded again how there is still only one. And the parts that are new… just aren’t that good.
Ok, the big Zion fight scene was pretty exciting, even though we all knew before it started that the humans didn’t stand a chance. Special effects can still sometimes win me over.
(Originally from my flying website from 2005 or so. The original publish date is lost)

Bought from NESail.com (I broke 1 of the 11×5.5 e props prop, and I can’t be without props for Burning Man!
Bought from CheapBatteryPacks.com 4 10-cell CBP 1050 2/3A NIMH packs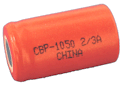
Bought from nesail.com
| Wingspan | 39.95 in. |
|---|---|
| Wingarea | 384 in² |
| Weight | 32 oz. |
| Wingloading | 11 oz/ft² |
| Airfoil | Symmetrical |
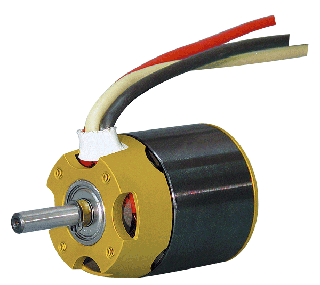 Axi 2814/12 (Weight (gms) 131, Diameter (mm) 35.5, Length (mm) 48.5, Shaft Dia (mm) 5mm, Stator Dia (mm) 28, Rotor Length (mm) 14, Efficiency 80%. Kv(rpm/volt) 1270, no-load current 2 amps, Rm (milliOhms) 67, battery cells 7-10) full specs
bought from nesail.com

OLYMPUS DIGITAL CAMERA





(Originally from my flying website from 2005 or so. The original publish date is lost)
Here’s several Zagi making hints I’ve found online. Most of them came from ClubZagi.com and YourZagi.com. The best reference is the Zagi Manual pdf from Mike’s Hobby Shop. Cliff at Atlanta Hobby has been my pleasant & responsive pushe… Zagi dealer. Those sites have a lot more tips than I list here. Check ’em out. I’ve rewritten these hints with my own comments.
Zagi Manual – good
Use Shoe Goo or other silicon based adhesive to attach the motor to the plastic pod this keeps it from coming out on hard impacts with the ground.
Use the old 3M 77 spray adhesive. It was discontinued in 2002 or so. But don’t use the new stuff in the purple and black can!! They changed the formulation to be better for the environment but the new acetone formulation eats the foam. I don’t know what you should use instead, sorry!
 . |
Add a strip of plastic to your batteries so they will be easier to find when they eject from the plane on impact. My strip is only about 4″ (a lot shorter than the photo)… that’s easier to tuck in for flying.
|
| When the speed control is put in the plane, loop the wires around itself and put a zip tie on them so that when the battery is pulled out of the plane in the event of a crash the strain is on the motor not the speed control. |
 |
| Cut the nose back a little from the leading edge of the plane. This will let the foam absorb some of the impact not the plastic. This ultimately didn’t save my tip from cracking, but what are ya gonna do? |
 |
 |
Use the extra foam that is in the kit to make a landing and launching skid on the bottom of the plane. I haven’t done this yet. I used the extra foam for other little things. Oop!
|
| The props have to be turned around were the lettering is toward the back of the airplane as shown in the picture. |
 |
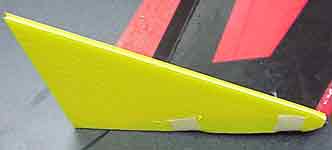 |
We found that the lexan tips that it comes with cause the plane to wonder find some coraplast sign material and cut your own wing tips this will help stability in flight. Use 2 mm coroplast… most roadsigns are 4 mm.
|
|
When installing the receiver in the Zagi 400 X the instruction call for it to be placed in the nose of the airplane. Don’t put it there! Mount it in the wing on either side of the electronics pod this will protect the receiver in a crash. Also note the servos are laying down in the wing not standing upright.
|
 |
 |
Note receiver is half way under tray with xtal on the outside for easy changing if necessary. The receiver will be covered by the colored tape when the tray is taped on. (Zagi 400X)
|
——————————————————————-
 When you examine the wing core, you might notice strands or “hairs” of glue and hard plastic. Gently remove these with your fingertips or gently pry up the tip of one strand with a knife to get it started. If your kit included a small block of EPP foam, this can be used for gently rubbing off all of the excess foam “hairs”.
You might find some fairly thick pieces that wander across the wing. This is a normal side effect of the hot wire used to cut your core. Gently pry them up. The truly large ones might leave a small indentation in the foam after you remove them. The foam will slowly expand out again over a few hours so try not to worry about them. This is normal.
——————————————————————-
Use a coat hanger to hang it on the wall.

——————————————————————-
put strapping tape on the inside of the battery tray, top and bottom. To keep the tray in one piece.
——————————————————————-
When you get your first roll of Monocote, know that before you try to stick it to your plane, you should peel off the very thin, transparent protective coating. My first time, I didn’t catch this important point and just cranked up the iron… it stuck, but crappily.
——————————————————————-
If your elevon comes off during flight, exciting things are bound to happen. The Mylar hinge tape provided with the kit is fine, but there is a better solution which can be applied to all of your aircraft. Winter flying plays havoc with the stock hinge tape as too many fliers have discovered 300 feet AGL (above ground level). Strapping tape does not seem to be as susceptible to thermal weakness as the Mylar hinge tape is. If you originally used the hinge tape, check it during the winter if you fly during cold weather, and certainly before the first flight after winter. At some point, replace it with strapping tape.
Before applying your hinge tape, make sure you mask off the elevon and lightly spray some Super 77 on it. Let it dry before applying the tape. Although S77 is not required when applying strapping tape, it should be done regardless to ensure that your hinges will not come off until after the aircraft is destroyed.
The best example of this has been done by Andy Willetts and is show here.
 |
If you have 3/4″ or 1″ width strapping tape, you can use the over-under tape hinge method.You will need at least two “sets” per elevon and should do three if you can afford the weight.
If done correctly, it simply does not fail. (click for a slightly larger picture) |
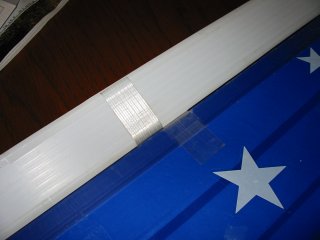 |
A compromise is to do 3 sets with only 2 hinges per set. Over 100 flights have been done with these particular hinges and they have never come loose or needed to be replaced.(1600×1200 large picture warning) |
Some have used the over-under hinge, then extended their Ultracote or a film covering over and around the elevon for additional strength and clean looks. If you do this, make sure that you have not added a tremendous amount of resistance that your servo now has to overcome.
Buzzman has a great picture that shows an alternative method for hinges that you can view here.
——————————————————————
http://www.yourzagi.com/covering.htm
